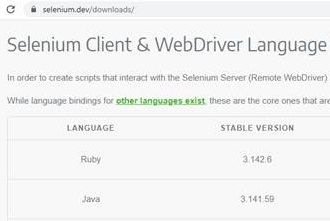
This guide assumes that you already have Eclipse and Java installed. You’ll want to download the latest stable Java release from the Selenium website.
Configuring WebDriver
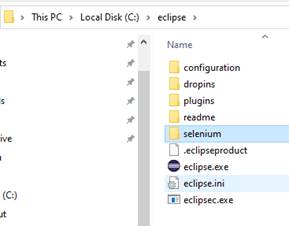
Once downloaded, extract the zipped file to a folder of your choosing. I personally put Eclipse right in my C: directory and put the Selenium files within a folder called “selenium”. The extracted files will be all of the required jar files which enable you to create test scripts in Java.
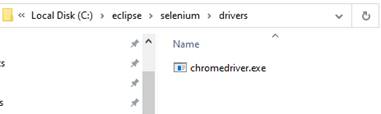
Next, you’ll want to download a web driver for Selenium. The example is going to use Chrome. Check your Chrome version and make sure to download the appropriate one for your browser from the ChromeDriver website. Once downloaded, extract the zipped file to a folder of your choosing. I personally put the drivers all under my selenium folder within a folder called “drivers”.
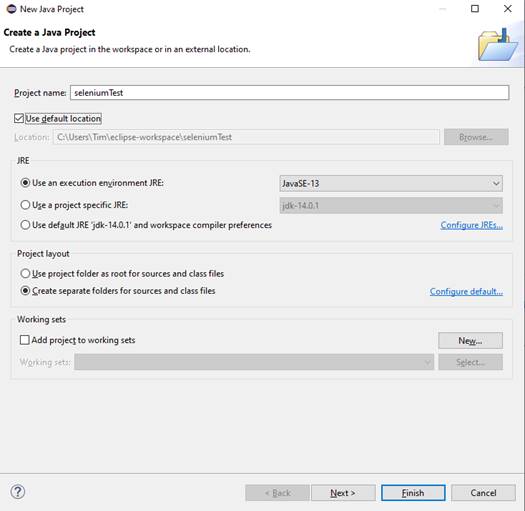
Configuring Libraries with Eclipse IDE Open the Eclipse IDE and create a new java based project following File -> New -> Java Project. For now, just call it “seleniumTest”, so that you can follow along.

Select Don’t Create for the module:

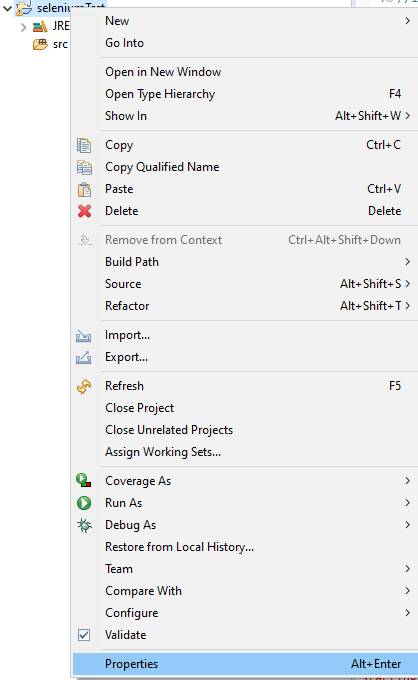
Right click on the project folder and select Properties:
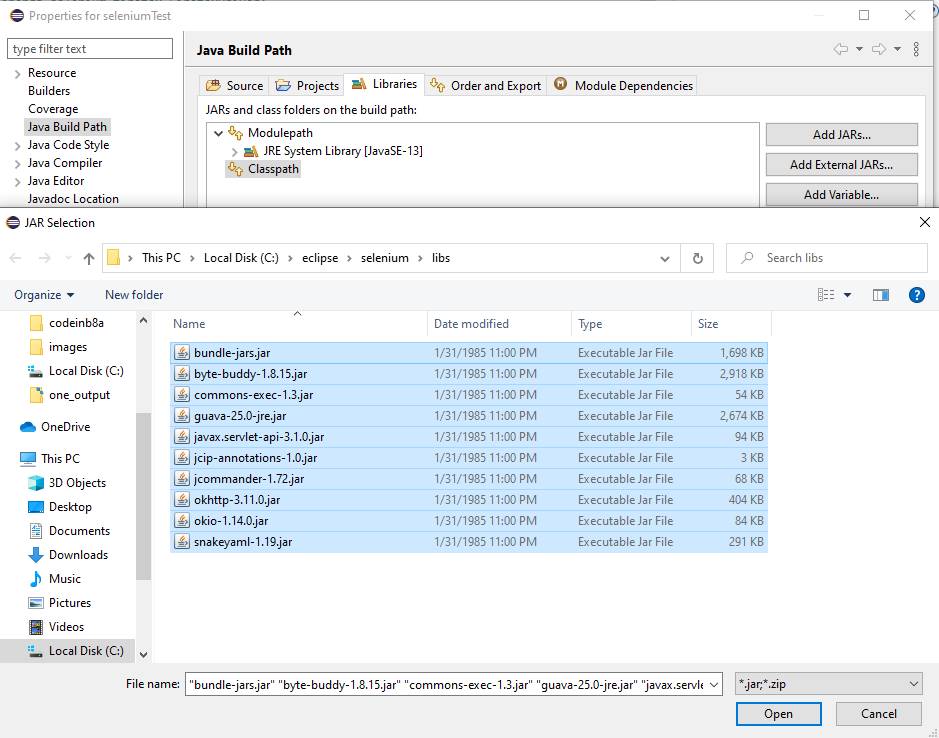
Go to “Java Build Path” and select the “Libraries” tab. Next, press the “Add External JARs” button, select all of the selenium libs, and Press the “Open” to add them:
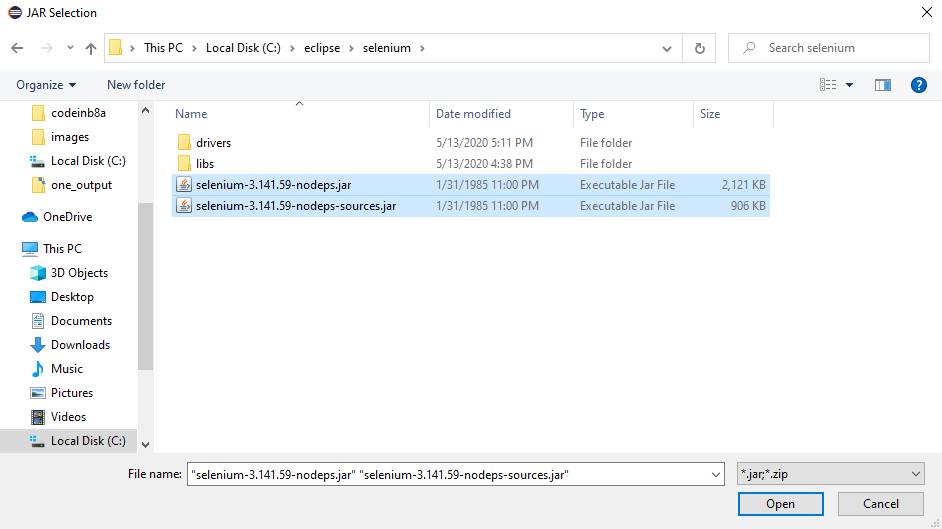
Also, add the selenium jars too:
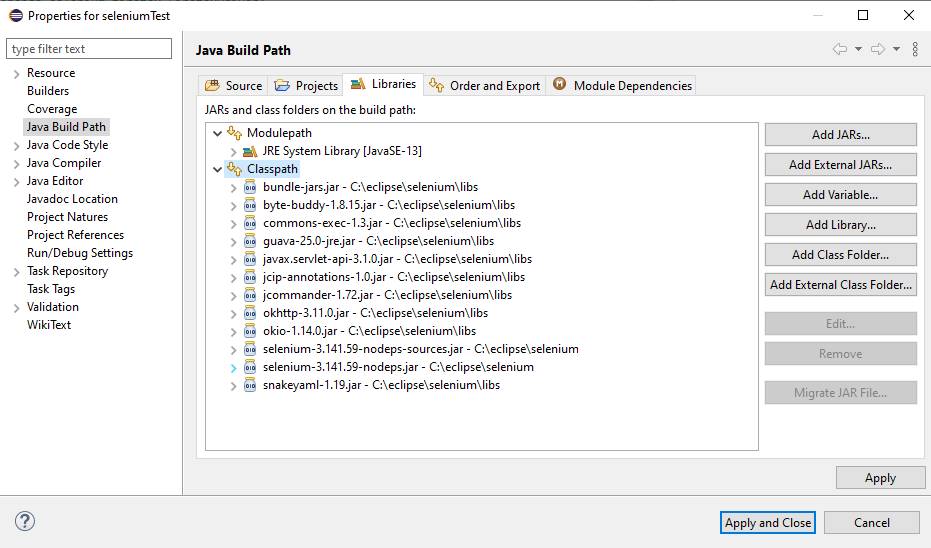
Press the “Apply and Close” button:
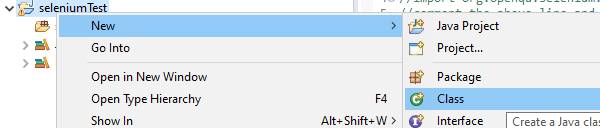
Right click on the project folder, go to New and select to add a new Class:
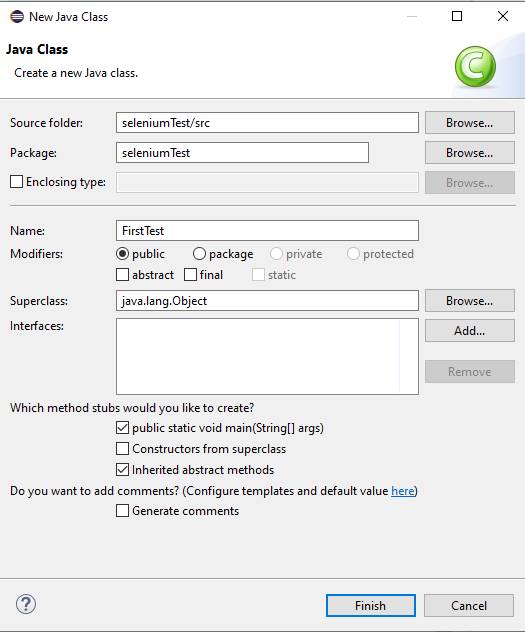
Name the new Java class “FirstTest” and press the “Finish” button:
If you’ve followed the naming above you should be able to copy and paste the below code into your class replacing the whole thing.
package seleniumTest;

import org.openqa.selenium.WebDriver;
import org.openqa.selenium.chrome.ChromeDriver;

public class FirstTest {

public static void main(String[] args) {
        // declaration and instantiation of objects/variables
System.setProperty("webdriver.chrome.driver","C:\\eclipse\\selenium\\drivers\\chromedriver.exe");
WebDriver driver = new ChromeDriver();

        String baseUrl = "https://en.wikipedia.org/wiki/Pizza";
        String expectedTitle = "Pizza - Wikipedia";
        String actualTitle = "";

        // launch Chrome and direct it to the Base URL
        driver.get(baseUrl);

        // get the actual value of the title
        actualTitle = driver.getTitle();

        /*
         * compare the actual title of the page with the expected one and print
         * the result as "Passed" or "Failed"
         */
        if (actualTitle.contentEquals(expectedTitle)){
            System.out.println("Test Passed!");
        } else {
            System.out.println("Test Failed");
        }

        //close Chrome
        driver.close();
}

}
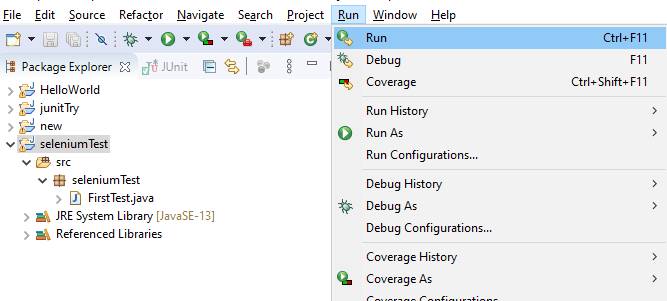
Save the class and then in the menu go to Run -> Run:
Chrome should open the wiki page for Pizza and verify the title successfully, so you should see a “Test Passed!” in the Console output:

That’s it! You ran your first Java Selenium test within the Eclipse IDE. As always, stay inb8a!